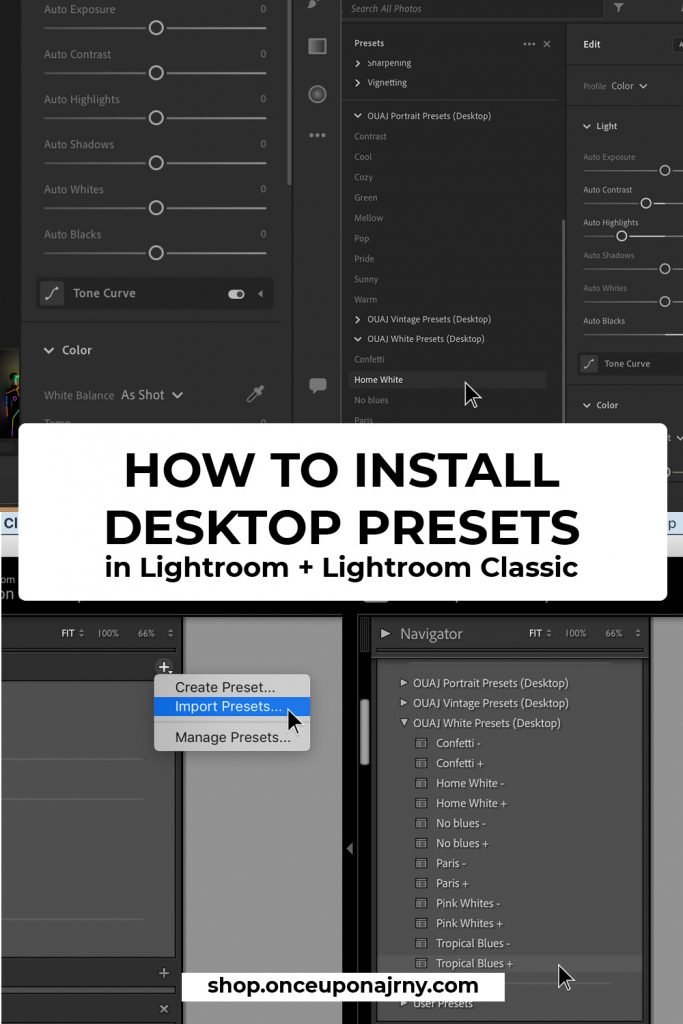
If you bought our Lightroom desktop presets this is the installation guide for you! We will explain step-by-step how to install presets on desktop – for both Windows and Mac. This installation guide is for Lightroom, Lightroom Classic (from version 7.3), and Photoshop (Adobe Camera Raw).
You need a Creative Cloud subscription to use these presets.
For the older versions of Lightroom Classic (< 7.2), we have a different installation guide for you.
If you are unsure which version you use, check our FAQ-page.
Did you buy our mobile presets? Please check our article How to Add Presets to Lightroom Mobile.
Jump to:
Install to Lightroom
Import to Lightroom Classic (version 7.3 or newer)
Install to Photoshop (Adobe Camera Raw)
NOTES:
- The white balance (WB) is NOT included in any of our presets, you need to adjust this yourself if the WB is off.
- You might need to make some small adjustments for the best results.
- Please show us your beautiful creations and use #onceuponapreset when you share your edited photos!
You can always reach out for support, email to [email protected].
Time needed: 5 minutes
How to Install Lightroom Presets on Desktop (.XMP Files)
- Open Lightroom
Previously Lightroom CC (Creative Cloud). The icon looks like the mobile app icon and shows the letters ‘Lr’.
- Download the presets from the download link in the confirmation email
After your order, you receive an order confirmation and email with a download link. You do NOT have to unzip the download!
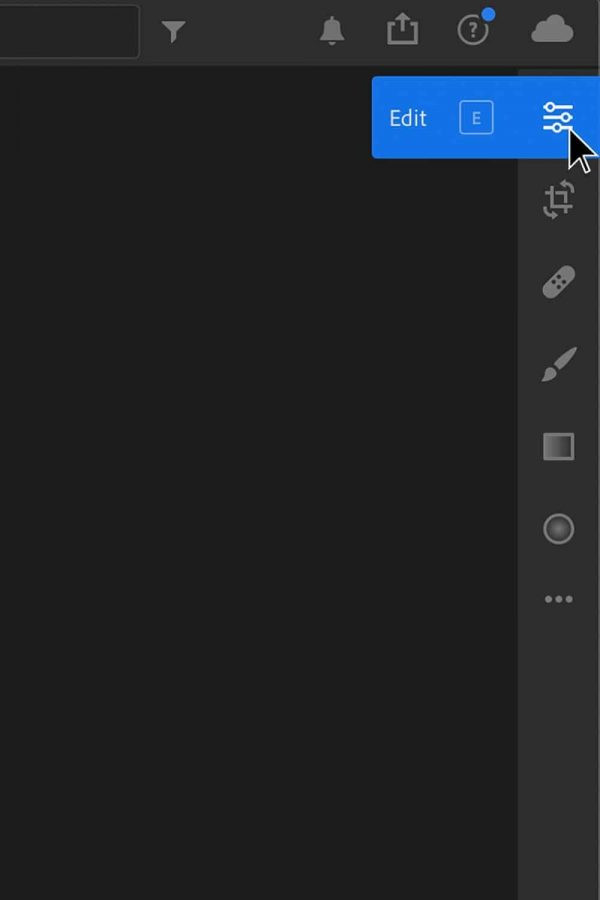
- Click the top-right icon ‘Edit’
shortcut: E
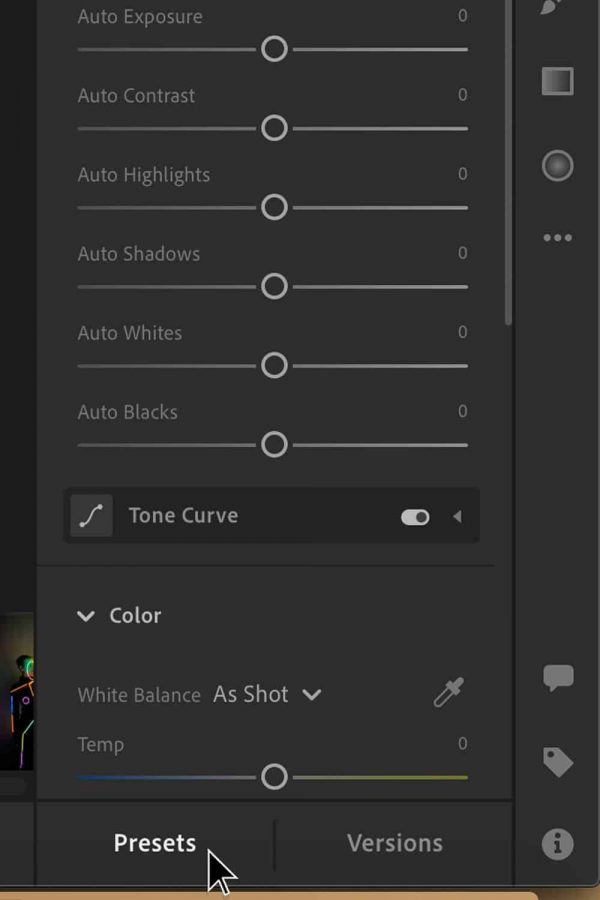
- Click ‘Presets’
At the bottom (right) of your screen.
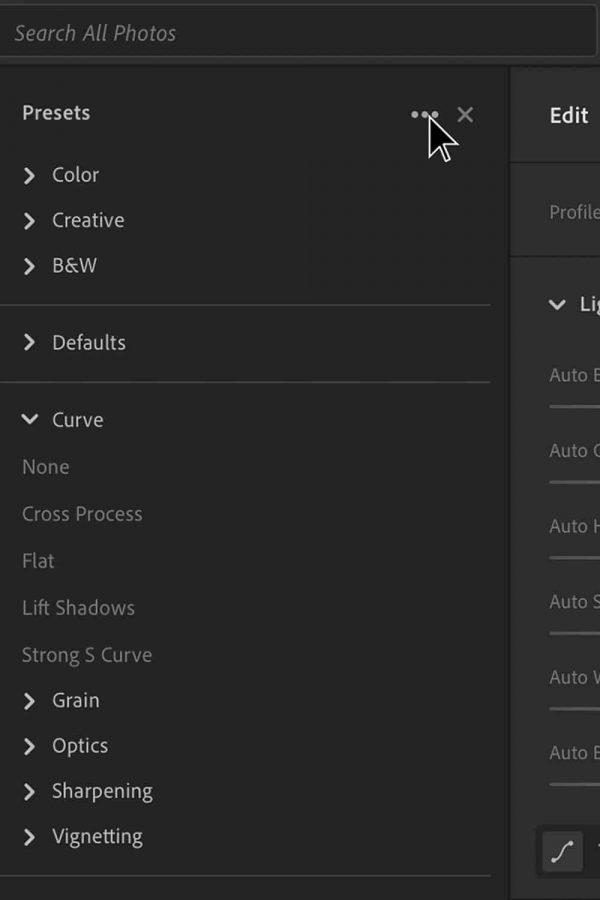
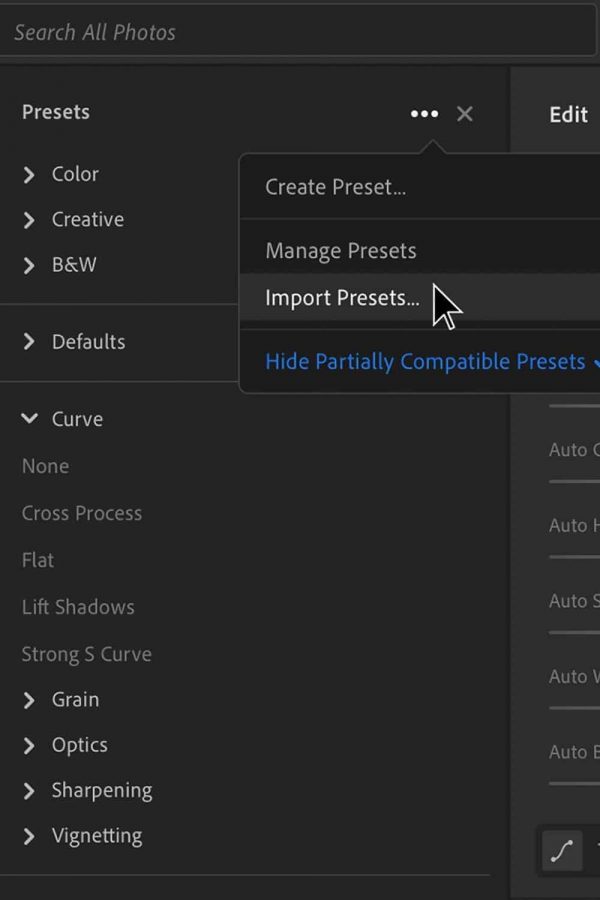
- Click the three dots on top and ‘Import Presets…’
This will open your files on your computer
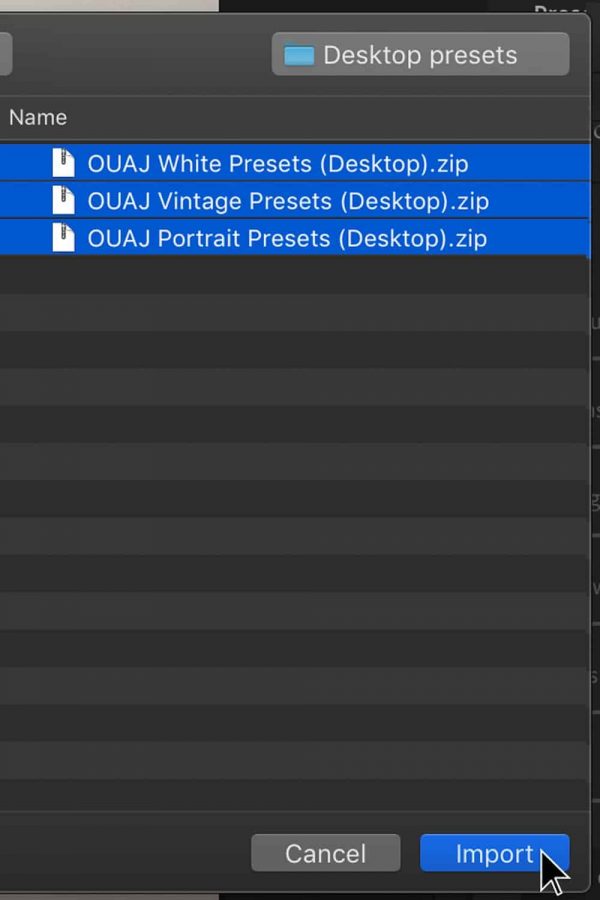
- Find the ZIP-file you downloaded and click ‘Import’
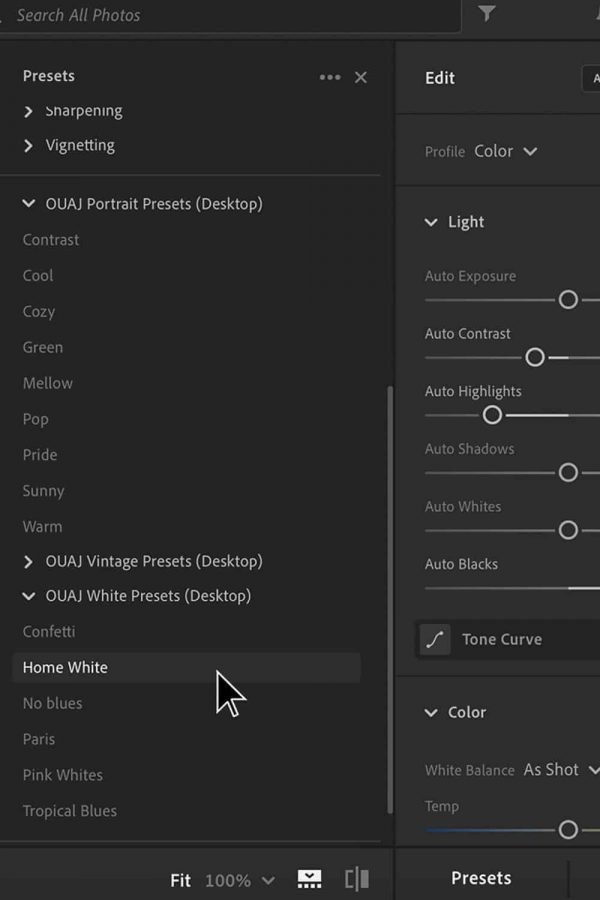
- The preset pack is now imported!
Click the little arrow in front of the name ‘OUAJ …’ to show the presets.
- If you have a Creative Cloud subscription, these presets will sync to Lightroom Mobile so you can use them on your phone too! Happy editing!
How to Install Presets on Desktop – Lightroom Classic (.XMP Files)
- Launch Lightroom Classic (version 7.3 or newer)
The latest icon of Lightroom Classic shows the letters ‘LrC’ and has rounded corners. If you have the old icon with sharp corners, check your version. - Download the presets from the download link in the confirmation email
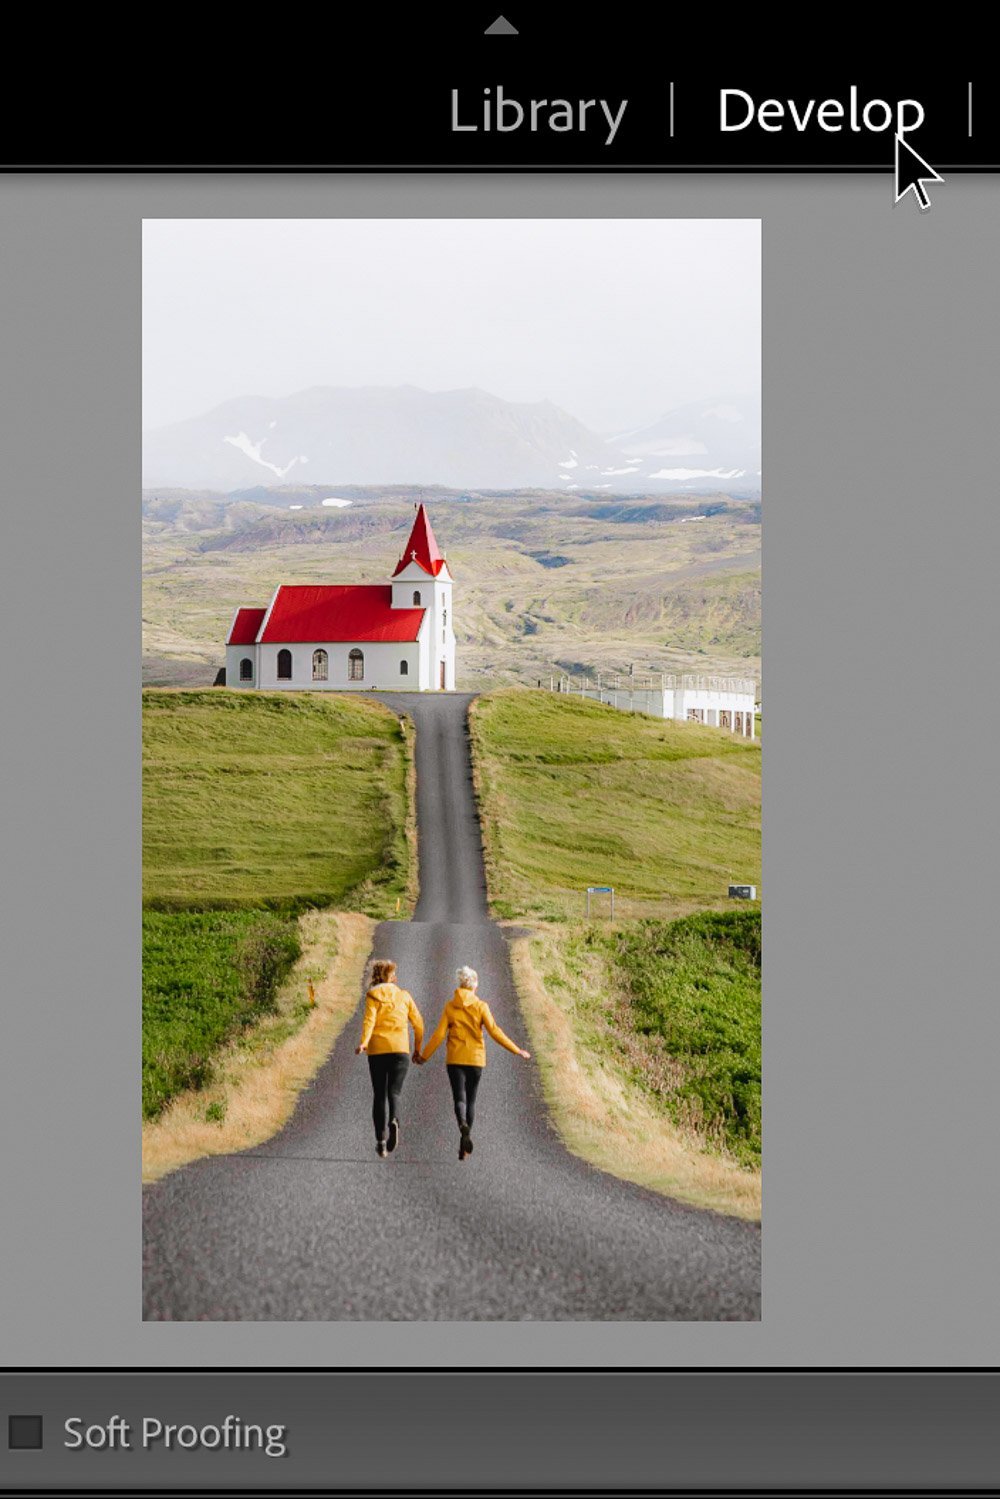
After your order, you receive an order confirmation and email with a download link. You do NOT have to unzip the download! - Import an image and click on ‘Develop’ mode
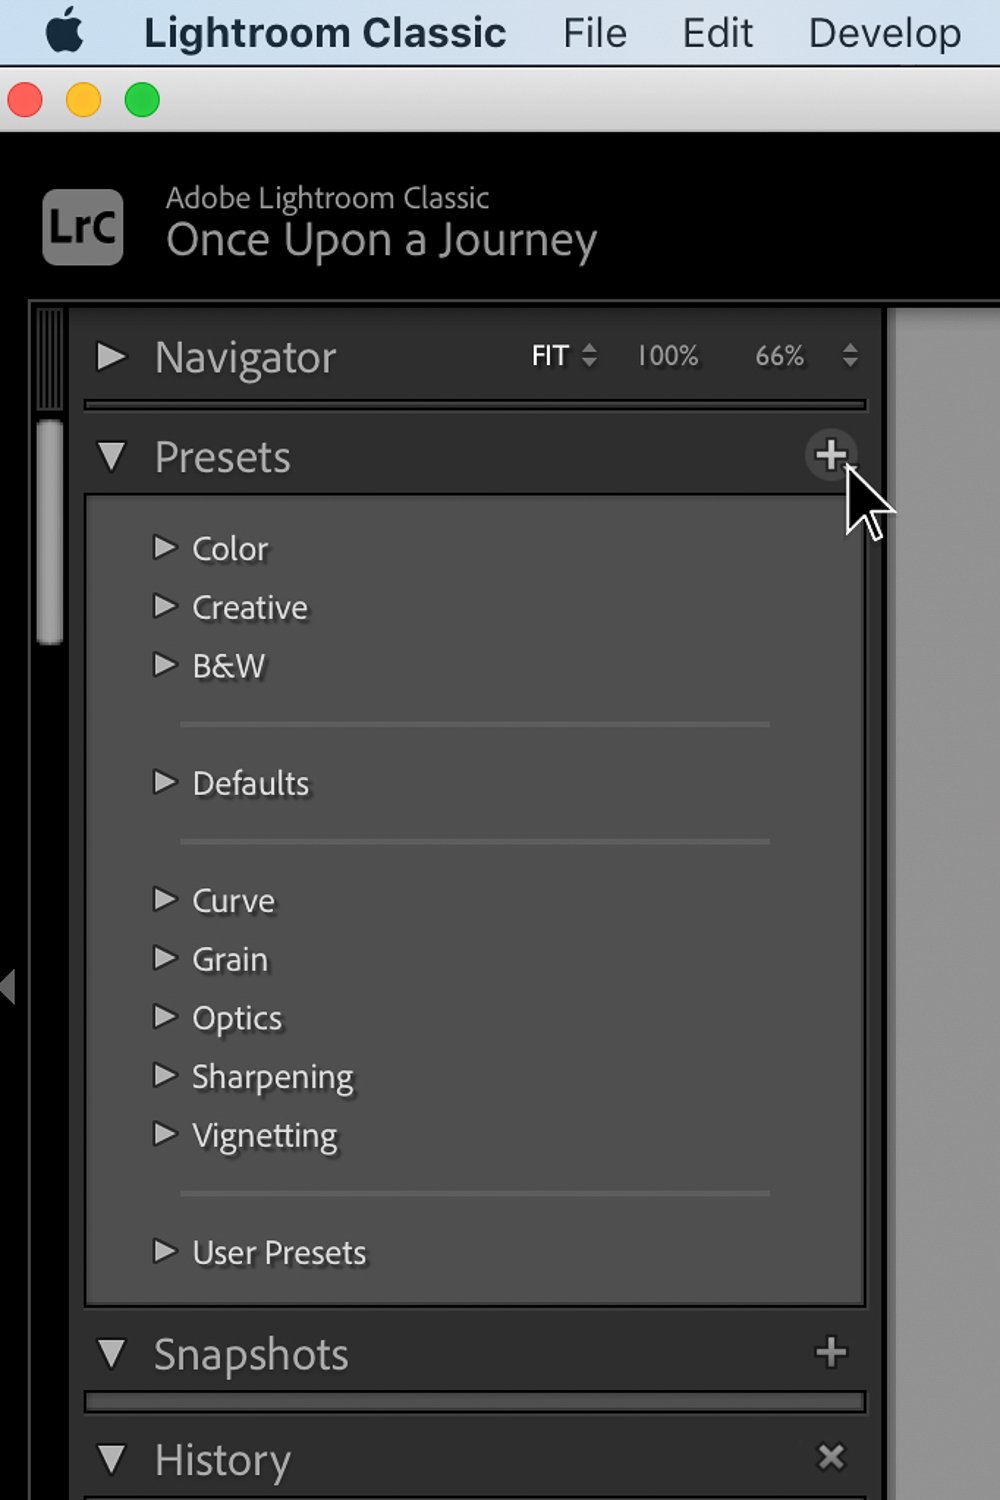
The mode is available in the menu next to ‘Library’. - In the left panel, find the tab ‘Presets’
The tab will be below ‘Navigator’ - Click the ‘+’ icon and ‘Import Presets…’
The ‘+’ icon is on the top right of the ‘presets’ tab. - Find the ZIP-files you want to import and click ‘Import’.
Remember: you do not have to unzip them. - The preset packs are now imported!
You can click the little triangle to show the presets. - Happy editing!
How to Install Presets in Photoshop (.XMP Files)
- Download the presets from the download link in the confirmation email.
After your order, you receive an order confirmation and email with a download link. You do NOT have to unzip the download! - Launch Photoshop (desktop) and import a photo.
- Open Adobe Camera Raw (ACR).
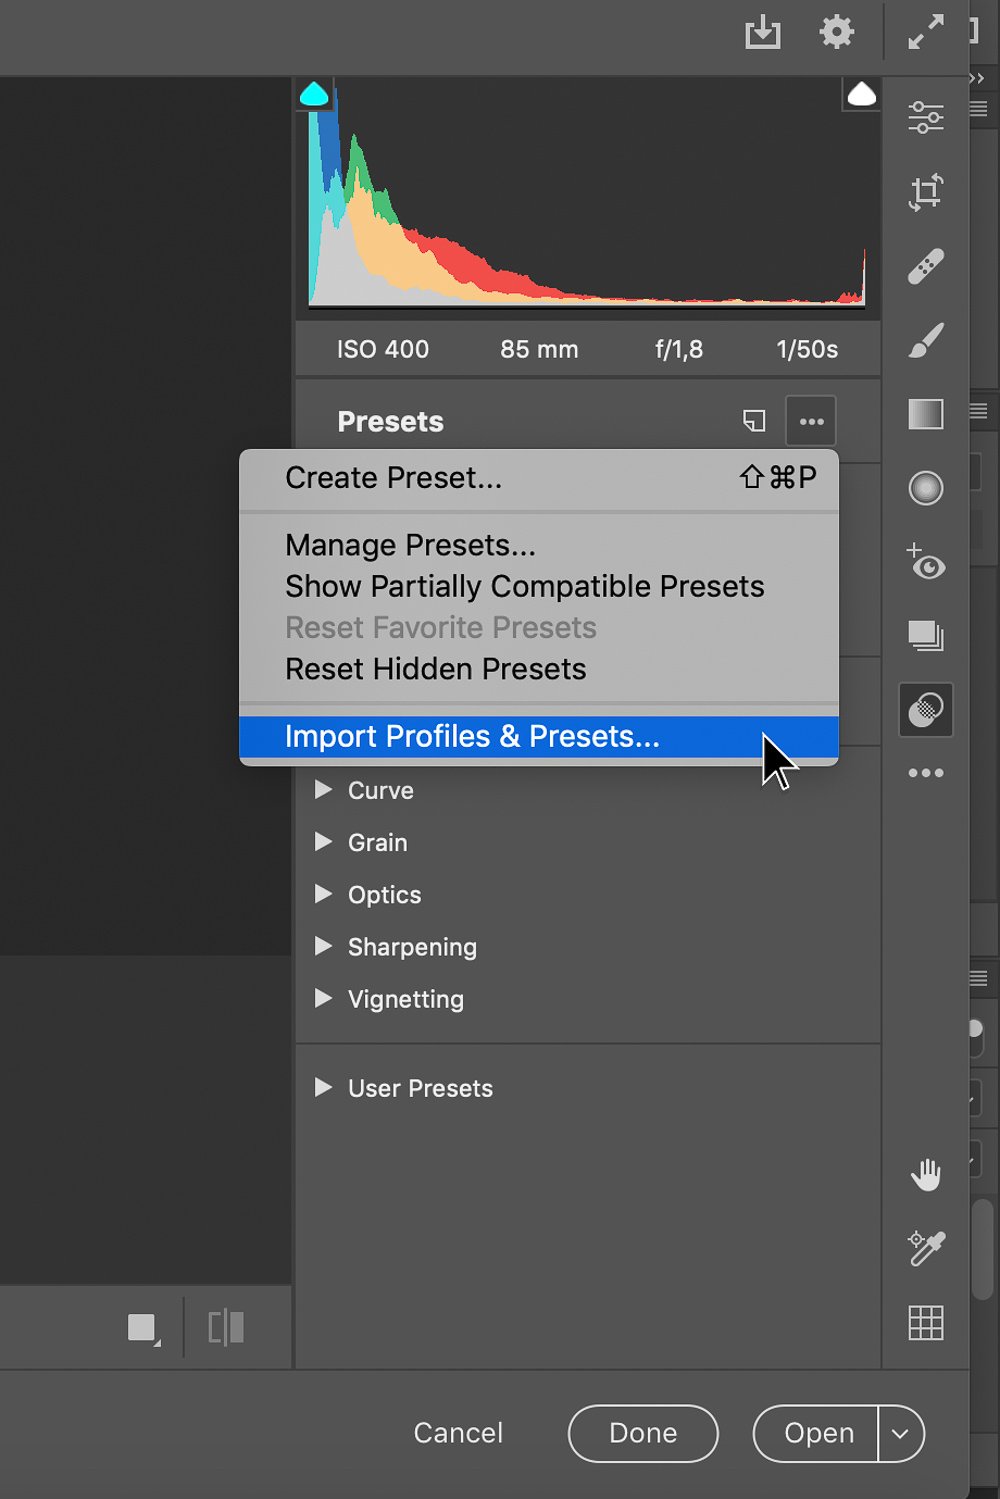
If you open a RAW-file in Photoshop, ACR will automatically open. Or go to Filter > Camera Raw Filter… (shortcut: ⇧⌘A on Mac, Shift+ Ctrl+ A on Windows) - Click ‘Presets’.
Shortcut: Shift + P on Mac and Windows - Click the 3 dots and ‘Import Profiles & Presets…’.
- Find the ZIP-file on your computer and click ‘Import’.
- The preset pack is now imported, you can click the little triangle to show the presets.
- Happy editing!
Please share your beautiful creations and use #onceuponapreset when you share your edited photos!
PIN THIS FOR LATER
